Getting Started With Klean CRM (Step-by-Step Guide)

With Klean CRM, we attempt to make a cleaning app as simple as possible. One that needs minimal instructions to setup. One where you can get up and running in less than an hour. 

With that said, we know that there is still a need step-by-step setup guide to make sure that setting up your account goes as smoothly as possible. This is our attempt at an all-encompassing Klean CRM setup guide that hopefully answers all your questions and concerns about getting your account up and running.

So what can you do with Klean CRM? Here is just a little glimpse of what is possible with our cleaning business software:

  • Customer database
  • Cleaning calendar management
  • Customizable for various cleaning industries
  • Financial analytics dashboard showing you how your business is doing
  • Send invoices and quotes
  • Send automated cleaning reminders to your cleaners
  • Send text reminders to your customers of their upcoming cleanings
  • Send automated payment reminders for past-due invoices
  • Easily import your customers from your existing software
  • Add a second user to your account—perfect if you have an admin assistant
Table of Contents

Step 1: Sign-Up Process

1. Tap on the Sign Up option.

2. Enter your information.

Step 2: Verify Email

A verification number will be emailed to your email address once you have completed the form.

1. To ensure the accuracy of your contact information, the app will send a verification code via email.

2. To validate an email address, enter the verification code in the app.

Refreshing the app will automatically generate a new verification code if the old one has expired.

Once you enter all the information, you’ll be taken to the dashboard and can start using the app.

Step 3: Log-In

1. Enter Credentials.

To stay logged in, enter your credentials and check the “Keep me logged in for 30 days” box.

Step 4: Using the App

Once you are logged in, the app is pretty simple to use. 

The left menu pane is where you will spend most of your time. It is where you all your information will reside.

1. Home, Calendar, Customers, Appointment, Cleaners, Invoice, Financials, and Conversation are shown on the home page of the Klean CRM app.

Right Upper Icon

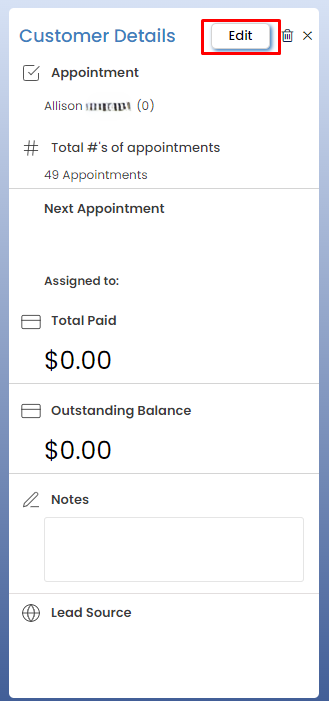
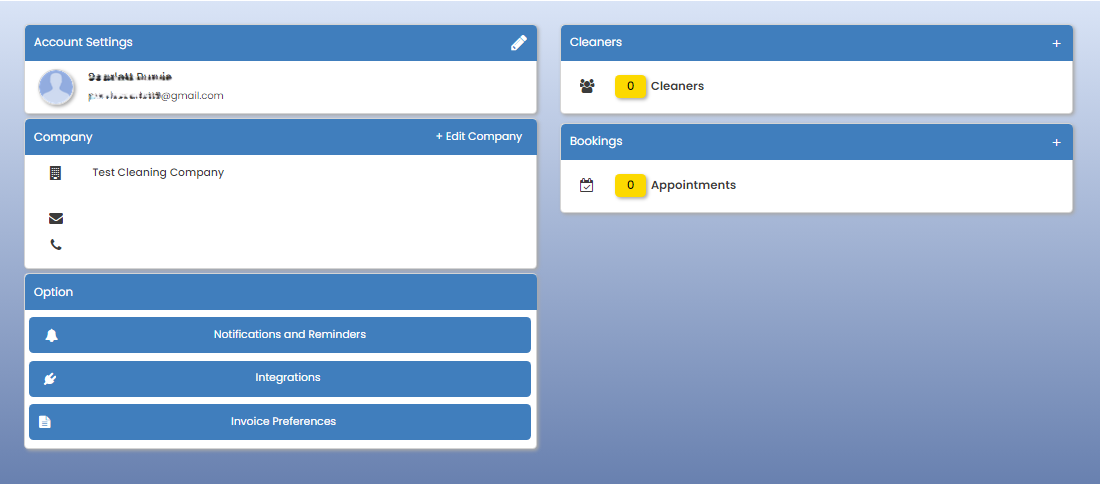
The top right corner where the icon is will be home to your various account settings.

Here you can update your account information, edit the default text of your automated SMS messages, change invoice preferences, add a uswer, etc
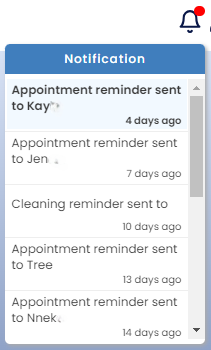
2. Use the profile “🙎🏻‍♂️“ icon to manage your account and the notification “🔔” icon,  at the top right for alerts.
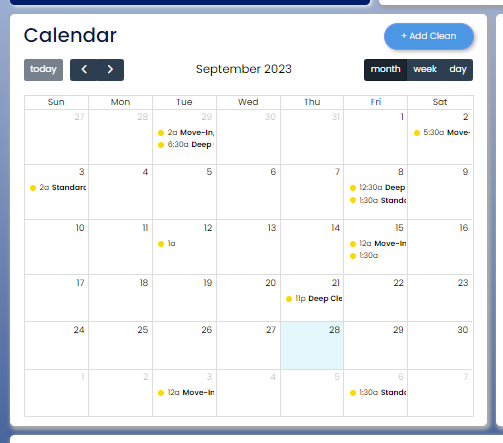
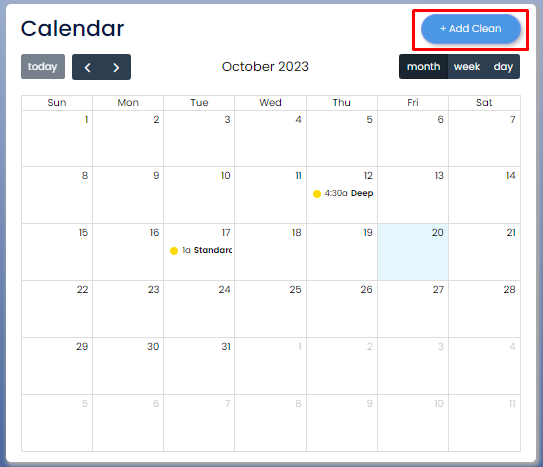
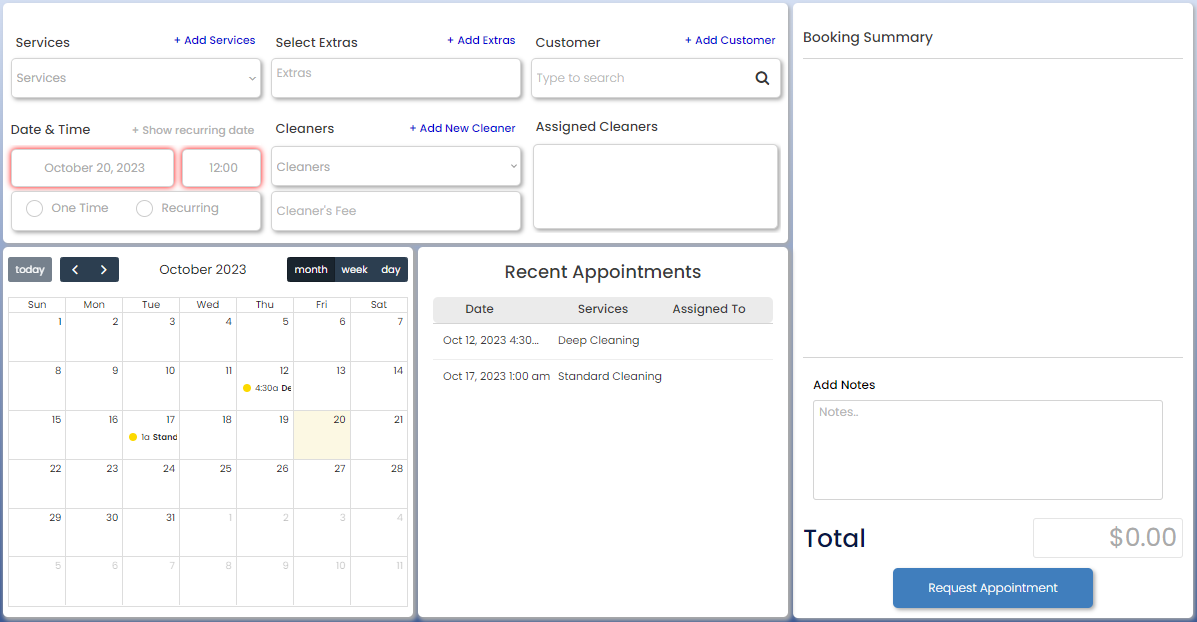
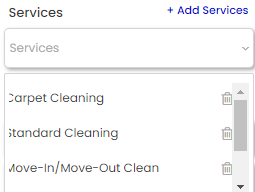
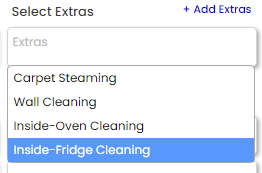
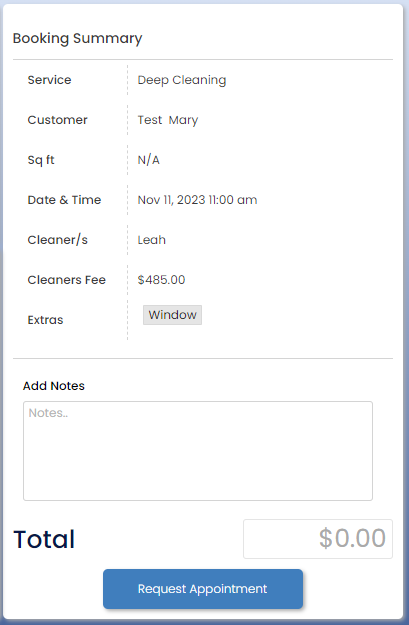
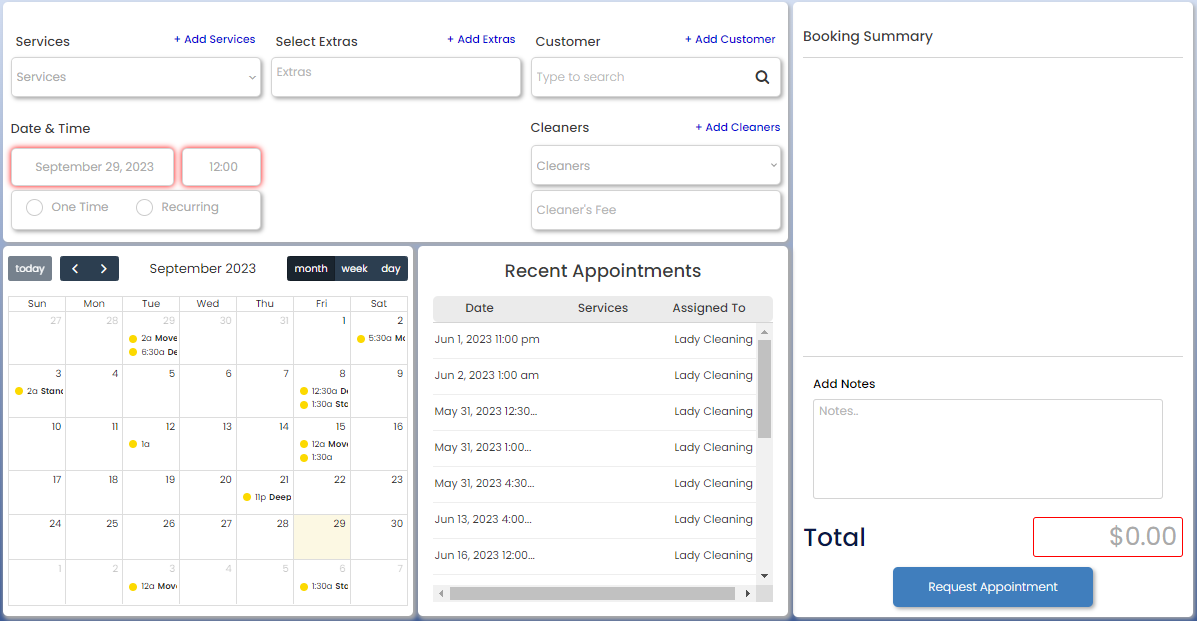
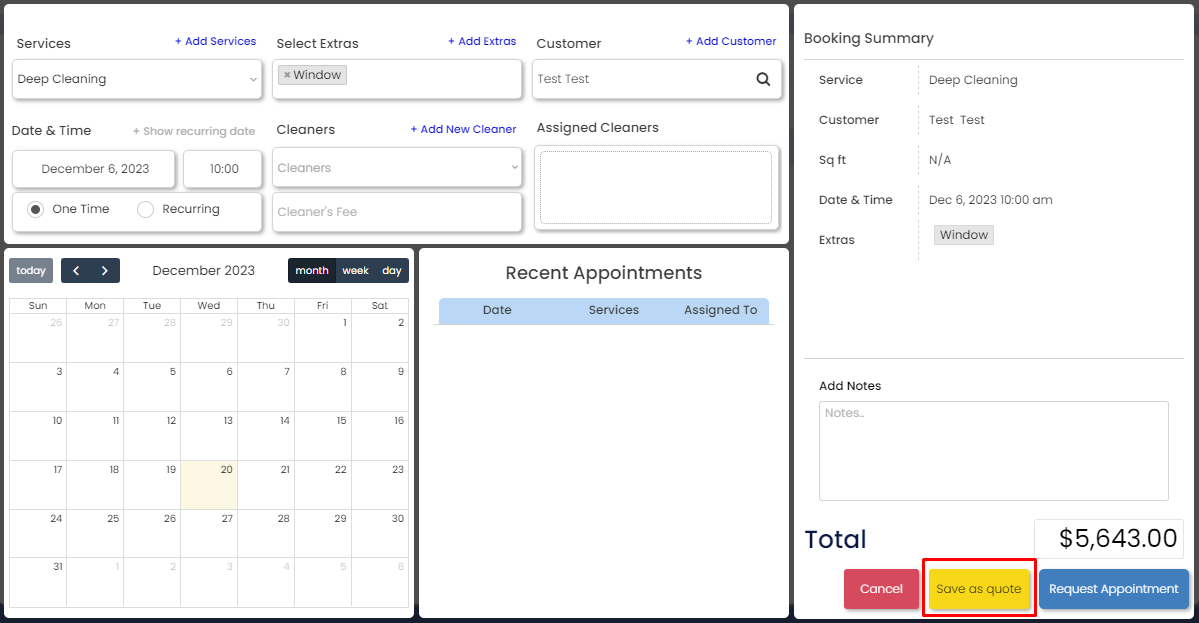
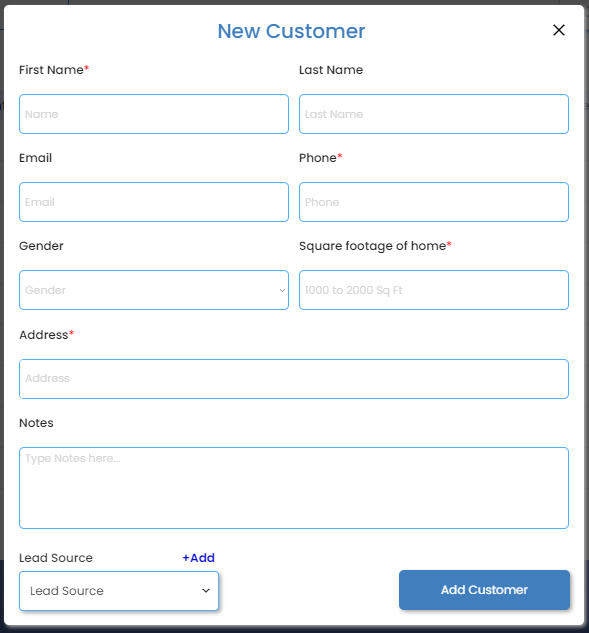
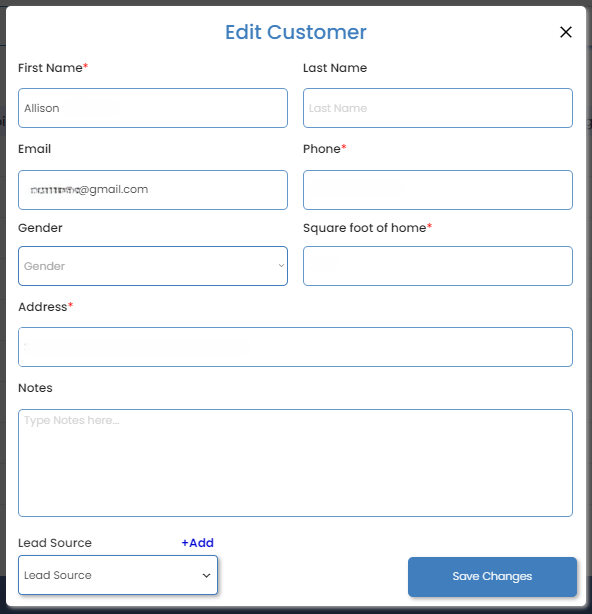
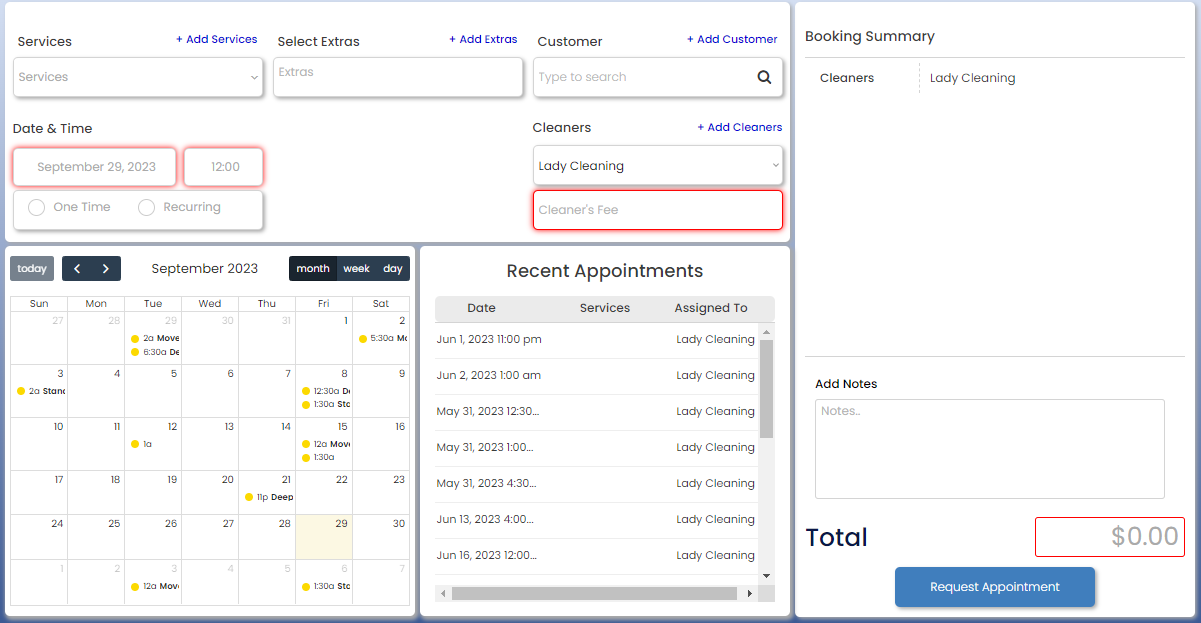
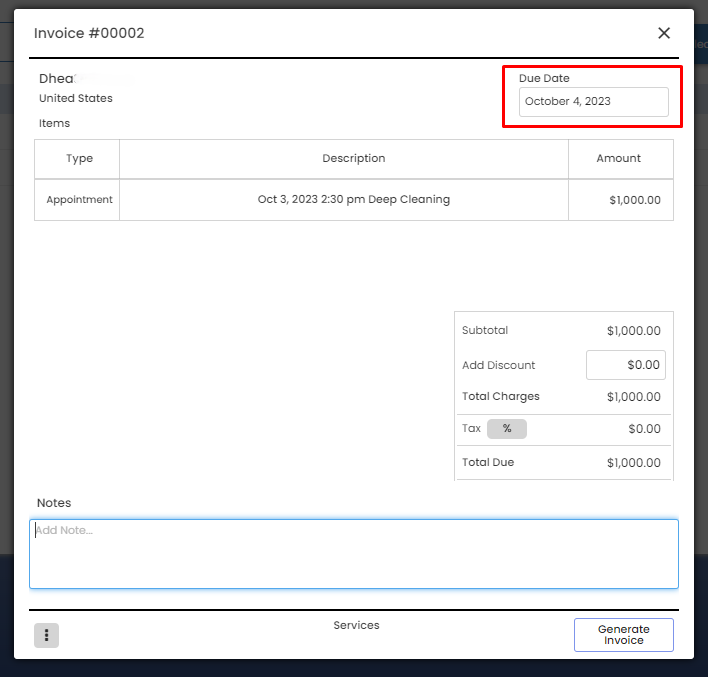
Account Tab

In Preferences, you can update Account and Company Information, manage Notifications and Reminders, set up Integrations, and adjust Invoice Preferences. You can also specify the number of cleaners and manage appointments.

Here, you can update your name, contact info, and email, change your profile photo, and manage your billing subscription , ensuring seamless access to the app’s premium features.

This feature helps organizations easily onboard new team members or collaborators by giving them access to the CRM platform, ensuring that all team members have the necessary access to customer data for better teamwork and customer engagement.

Dashboard

A visual display that provides a centralized and at-a-glance view of critical data and key performance indicators (KPIs) typically helps sales and customer service teams make informed decisions and track progress toward their goals.

You can click the boxes Cleaners, Conversation, and Financials to be redirected to that page.

✨ Cleaners

Contains information on the cleaners’ identities and cleaning schedules.

💬 Conversation

Allows you to send messages to remind the appointment schedule.

💲 Financials

Refers to a piece of financial information, and transactions related to cleaning services are managed and recorded.

📈 Revenue Tab

An overview of total earnings or income generated through the application 

By clicking the “⚙️” icon, you can select “PAID or NOT PAID” to filter the tab.

Calendar

It will display each customer’s appointments as well as the designated cleaners.

+Add Clean

Where you can add clean/appointments.

Services 🛠️

You can choose services and add extra ones based on the customer’s preferences. Here you can add custom services.

Select Extras ➕

You can choose extra cleaning or additional items depending on the demands of the customer.

Customer 👨🏻‍💼

Search Customer or Add Customer.

Date & Time ⌚

You have the option to choose a specific day and time, in addition to deciding whether the customer should establish either a ‘One-Time’ or ‘Recurring’ agreement with the cleaning service providers.

Cleaners 🧹

You can introduce new cleaners or choose from the pool of available cleaners for your clients’ appointments.

Booking Summary 📑

A “booking summary” is a brief overview of an appointment, including the service, customer information, area, date, time, cleaners, fee, extras, notes, and payment amount. It serves as a final check before confirmation, ensuring clarity and preventing misunderstandings in the booking process. The total field also allows for manual input of the payment amount.

Recent Appointments

You can view the recent appointments with the assigned cleaners.

The cleaning summary can be viewed by clicking the appointment.

Cleaning Summary

Booked Appointments (Current Week)

An illustration of the appointments for a week can be seen as a line graph.

Last Booked Appointment (Last 30 Days)

An overview of prior appointments.

Upcoming Jobs (Next 7 days)

An illustration of upcoming Jobs.

Calendar

This calendar is typically known as a “cleaning appointment schedule” or a “cleaning service calendar.” This calendar is designed to display a visual representation of appointments for cleaners assigned to specific customers. Each appointment slot on the calendar is associated with a particular customer and their cleaning requirements. Cleaners’ schedules and customer appointments are illustrated in a way that allows for easy organization, tracking, and management of cleaning services. This type of calendar is a useful tool for cleaning service providers to ensure timely and efficient service delivery to their customers.

You will be redirected to the cleaner’s page after selecting “+ Add Employees“.

The Add Appointment Tab will be displayed after selecting “+ Add Clean“.

Click “Save as Quote” to open a user-friendly form with options like “Send Customer” for sharing, and a “Cancel” button for flexibility. The form’s “Close” button ensures efficient navigation, allows you to manage quotes seamlessly.

Customers

To manage and access customer-related information.

The “Import Data” button enables you to upload or import client data in bulk from outside sources. This is ideal if you are moving from another platform.

A customer’s specific information can be manually entered and added to the system by selecting “Add Customer” from the menu.

You can access and change the details of a particular customer by clicking on the “✏️” icon. When necessary, you can utilize this to update information, make corrections, or add new data.

Clicking the Sort dropdown provides an option for sorting the customer information displayed on the page. Can choose from various sorting criteria, such as names, lead sources, or date created. Selecting a sorting option rearranges the customer data based on the chosen criterion, making it easier to find and access specific customer records.

Appointment

Manage and display scheduled appointments for a particular service, event, or activity. It typically includes features that indicate whether customers have paid for their appointments or not. It provides an overview of scheduled appointments and the payment status of customers. This includes a visual representation of upcoming appointments, distinguishing between customers who have made payments and those who have not. This differentiation helps track financial transactions and ensure that payment records are up to date.

You will be redirected to the Add Appointment tab by selecting + Add Clean”.

The customer data on the page can be sorted by selecting a category from the Sort menu. Selecting a sorting option rearranges the customer data based on the chosen criterion, making it easier to find and access specific customer records.

The floating group Deep Cleaning will appear when the “✏️ ”icon is clicked, allowing you to create an invoice for the client.

Select the dropdown menu next to the 👤 Customer field to see whether a customer has been paid or not.

You can enter or specify the customer’s entire payment amount.

You do not need to create an invoice after a customer pays. But if your customer requires it or you want to create one, you can click the “Create Invoice” button once you have completed or filled out all the necessary information.

An invoice form will pop up, and you need to fill in the Due Date.

You may choose to add a discount or not. You can also add notes here, such as the date they paid, or their method of payment, or virtually anything else you want to put here.

After filling out the needed information, click the Save button.

The Create Invoice will change to View Invoice.

Once you created an Invoice form, you can edit the details by clicking the “View Invoice” button.

Cleaners

To manage and provide information about cleaning personnel.

When you click on a specified cleaner, you will be able to see all their assigned jobs. Each assigned job will also display how much they are being paid for that job. Once you have paid your cleaners for that job, you will set the payment status in this tab to “Paid.” 

If you do not set the payment status to Paid for the job after you have paid your cleaners, it will still appear as accrued payment and your financial statistics will not be accurate.

By clicking “+ Add Cleaners” it allows you to add or input information about individuals or entities associated with the cleaning service. It lets you include details about the cleaners or cleaning staff, such as their names, contact information, and availability.

In the “✏️” icon, you can edit the Cleaner’s information.

Invoice

The records of customer details, and services, specify payment terms, and track the status of invoices. This page often facilitates the generation of PDF invoices. It integrates with accounting systems for financial management streamlining the invoicing process and ensuring accurate record-keeping for financial transactions within the CRM.

Clicking the download icon allows you to download or save the invoice document as a file on the device or computer. This feature is particularly useful for those who wish to obtain a digital or printed copy of the invoice for their records or for sharing with customers.

When clicking the “👁” icon in the Invoice tab, there is a visual representation of the “View Invoice Form” feature. This icon serves as a graphical indicator that allows you to access and view the details of an invoice.

Financials

We hade this section for as a way to easily get a financial overview of your business in a simple graphical interface. Here you can see what your revenue, profit, average booking value, pending payouts, pending invoices, etc. 

Revenue Earned

The Financial Page displays total earnings, with a bar graph for visual representation. You can customize analysis based on accounting preferences and time frames.

The Paid and Paid/Unpaid dropdown allows you to choose between the “Paid” and the “Paid/Unpaid” of accounting. This selection determines how revenue and expenses are recognized in financial statements.

The Timeframe Selection dropdown provides options to select the timeframe for viewing the revenue data. You can choose from “Last Week,” “Last Month,” “Current Year,” and “Last Year” to analyze revenue trends over different periods. Additionally, you can select dates to view the graph analytics and total earnings.

Customer

A pie graph visually shows financial transactions among customer categories, providing insights into revenue composition and whether it’s one-time or recurring contracts, enabling you to understand your revenue sources.

Cleaners Expenses

The Cleaners Expenses feature operates seamlessly, allowing you to track both paid and unpaid expenses through intuitive dropdown menus. With the added convenience of date selection dropdowns, you can analyze and visualize your expenses through informative graphs, providing a comprehensive overview of financial data related to cleaning services.

Customers Outstanding Balance

Refers to the total debt owed to customers, including unpaid invoices and overdue payments.

Accrued Cleaners Payouts

Represent the funds that are owed to cleaners or contractors for jobs they have completed but have not yet been paid for.

Average Booking Value

Calculates the average revenue generated from each booking, providing insights for financial analysis and decision-making.

Estimated Revenue Calculated from Date Appointments Are Created

For forecast revenue, planning, and budgeting in businesses reliant on scheduled services.

Invoice Outstanding Balance

Refers to the amount of money that a customer owes to a business for goods or services that have been provided but not yet paid for.

Gross Profit

Refers to the amount of money that remains after deducting all expenses from the total revenue generated.

Bookings

Refers to clients with unpaid appointments.

Invoice

Refers to clients with unpaid invoices.

Projected Revenue

Projected revenue projects your revenue for the upcoming days, anywhere from the next 7 days to the next 30 days.

The Paid and Paid/Unpaid dropdown options in Projected Revenue function as selection menus to categorize income as either fully paid or a combination of paid and unpaid.

The Timeframe Selection dropdown in Projected Revenue allows you to choose the specific time period or duration for analyzing and projecting revenue data within the project.

Conversation

You can see the automated reminders sent in the Conversations tab. You can edit the automated messages by clicking on the right upper icon in the app and going to Preferences. 

You can send reminders to customers about upcoming appointments to ensure they receive timely notifications and stay informed.

Currently, you will only be able to send automated messages through the app. In the future, two-way and custom messaging will be enabled.